
What Exactly Is a Garage Floor Coating?
Durable Garage Flooring That Actually Handles Your Mess
Why settle for a stained, cracked concrete slab when your garage deserves a durable, finished surface? Garage flooring refers to specialized coatings, mats, or tiles designed to withstand heavy vehicles, chemical spills, and temperature extremes. These systems create a seamless, non-porous barrier that prevents stains and simplifies cleaning, while also enhancing traction and reducing dust. Proper surface preparation and application are critical, as they ensure long-term adhesion and resistance to hot tire pickup or moisture vapor.
What Exactly Is a Garage Floor Coating?
A garage floor coating is a specialized liquid-applied system designed to bond chemically with the concrete slab, creating a hard, protective film that resists oil, chemical spills, and tire abrasion. Unlike simple paint, these coatings consist of multiple layers—typically a primer, a topcoat, and sometimes a clear sealer—each serving a distinct functional purpose for the garage environment. The key distinction is that a proper coating penetrates the concrete pores, forming a continuous membrane that prevents moisture vapor transmission and surface dusting. For most residential garages, a two-part epoxy or polyaspartic system remains the gold standard. A single coat of any product rarely delivers the durability needed for vehicle traffic. Without thorough surface preparation—including diamond grinding and acid etching—even the best coating will fail prematurely. This system fundamentally transforms porous concrete into a resilient, easy-to-clean surface that withstands garage use.
How do epoxy and polyaspartic differ underfoot?
Underfoot, epoxy and polyaspartic coatings deliver vastly different tactile experiences. Epoxy forms a thick, rigid layer that feels hard and somewhat brittle, developing a slight tackiness under direct sunlight, which attracts tire marks. In contrast, polyaspartic remains flexible and feels smoother, staying cool to the touch even in high heat. This flexibility gives it a superior skid resistance underfoot in wet conditions, as the surface retains a subtle texture from the aggregate without the slippery gloss of standard epoxy. While epoxy can feel uncomfortably hot on bare feet during summer, polyaspartic’s faster-curing chemistry prevents that heat-related tackiness.
Q: How do epoxy and polyaspartic differ underfoot concerning slipperiness?
A: Epoxy’s smooth, glossy finish becomes dangerously slick when wet unless a non-slip additive is mixed in. Polyaspartic inherently provides better traction underfoot because its formulation allows for a built-in textured grip, even without additional granules, reducing slip hazards immediately after installation.
What makes concrete stains a separate option?
Concrete stains are a separate option because they penetrate the surface rather than coating it, sinking into the pores for a permanent, matte color shift. Unlike epoxy or polyurea that form a plastic film on top, stains won’t peel or chip but also offer zero protection against stains, chemicals, or tire scuffing. They’re purely cosmetic, giving that translucent look that showcases the concrete’s natural texture. You’d choose stains strictly for a low-maintenance, no-film aesthetic, fully accepting the floor will stay porous and vulnerable.

Concrete stains are a separate option because they color the concrete from within, offering a matte, natural look with zero protective film.
Key Benefits That Make a Poured Surface Worth It
A poured surface, like polyaspartic or epoxy, delivers a seamless, non-porous barrier that stops oil, antifreeze, and salt from staining or penetrating your concrete. This makes cleanup effortless—just a hose or a mop. Its high-gloss finish reflects light, brightening the garage, while the thick coating resists tire scuffing, hot-tire pickup, and heavy floor jacks far better than paint or tile. This durability eliminates the need for recoating every year.
Q: What is the single biggest practical advantage of a poured floor over modular tiles? A: A monolithic, waterproof membrane that prevents any liquid from seeping to the concrete below, protecting your slab and preventing musty odors.
How does this upgrade resist oil stains and tire marks?
This upgrade resists oil stains and tire marks through a non-porous surface chemistry. The poured material forms a dense, seamless barrier that prevents petroleum-based liquids from penetrating the concrete substrate. Spilled oil pools on the surface rather than soaking in, allowing simple wipe-up before staining occurs. Tire marks, caused by rubber transfer under heat and pressure, are mitigated by the surface’s high abrasion resistance. The hard, cured top layer minimizes rubber adhesion, while the absence of joints eliminates grooves where grime can accumulate and set. A clear urethane topcoat further shields against chemical etching from hot tires.
- Liquid repellency from a seamless, impermeable barrier stops oil from absorbing into pores.
- High-density surface hardness prevents tire rubber from bonding or leaving pigment deposits.
- Smooth, joint-free finish allows contaminants to be easily swept or mopped away.
- UV-stable formulation prevents yellowing or degradation that could trap stains over time.
Does a coated floor really reduce dust and concrete wear?
Yes, a coated floor directly reduces both dust and concrete wear in your garage. Bare concrete constantly sheds fine silica dust from traffic and temperature shifts, turning your space grimy. A durable polyaspartic or epoxy coating encapsulates the porous surface, locking that grit inside. The same hard layer acts as a sacrificial shield against tire friction, dropped tools, and chemical spills that erode raw concrete. Without the coating, every scrape grinds away concrete material; with it, the coating takes the abuse. You’ll sweep less and see no powdery residue, proving the floor stays cleaner and structurally sounder for years.
Selecting the Right Finish for Your Workshop or Parking Space
Selecting the right finish for your garage flooring hinges on the intended use between a workshop or parking space. For a workshop, prioritize a durable, urethane or polyaspartic coating that resists chemical spills, oil, and heavy tool drops while providing a non-slip texture. Epoxy with a textured additive offers excellent abrasion resistance for parking areas, as it withstands hot tire pickup and hydraulic fluid leaks without yellowing. A smooth, high-gloss finish is easier to clean but can be dangerously slick when wet, so choose a matte or satin sheen for parking. Conversely, a workshop benefits from a slightly rougher surface to improve footing during work. Ensure the coating system includes a primer for adhesion and a clear topcoat for UV protection if sunlight enters. Ultimately, the finish must match the load and chemical exposure of each specific zone.
Which product holds up best under heavy vehicle weight?
For sustained heavy vehicle weight, polyaspartic coatings hold up best due to their superior impact resistance and structural integrity. Unlike epoxy, which can soften under hot tire loads or develop stress cracks over time, polyaspartic forms a rigid, high-strength bond that resists indentation from jacks and stands. Its flexibility, paradoxically, prevents micro-cracking under repeated weight shifts. Polyurea flakes also offer excellent durability, though they often require a thicker build for comparable load-bearing capacity. Traditional paint will flake immediately under heavy cars, while vinyl tiles can crush or distort permanently if not reinforced. Q: Can epoxy support a heavy truck? A: Only if a high-build 100% solids system is professionally applied; consumer-grade epoxy fails under concentrated weight.
Should you go with a gloss, matte, or textured slip-resistant look?
For your garage floor, the choice between gloss, matte, or textured slip-resistant looks comes down to function over fashion. A gloss finish is super shiny and makes oil spills easy to wipe up, but it can be dangerously slick when wet. Matte offers a moderate grip and hides dust well, though stains may set in faster. A textured slip-resistant finish is your best bet for safety, especially if you work on cars or walk through with wet shoes. The downside? It’s tougher to clean than gloss, but the added traction prevents nasty falls. For a busy workshop or parking space, texture wins for real-world use.
| Finish | Best For | Downside |
|---|---|---|
| Gloss | Easy cleaning, showroom look | Very slippery when wet |
| Matte | Hiding dirt, lower glare | Stains absorb faster |
| Textured (slip-resistant) | Safety in wet or oily conditions | Harder to mop clean |
Step-by-Step Preparation for a Lasting Installation
For a lasting garage floor installation, begin by clearing the space entirely and examining the concrete for cracks or oil stains. Repair any damage with a concrete patching compound and degrease the floor thoroughly using a heavy-duty cleaner. The next critical step is profiling the surface via diamond grinding or acid etching to create a mechanical bond for the coating. After vacuuming all dust, apply a moisture test by taping a plastic sheet to the floor for 24 hours; if condensation appears, a moisture barrier is required. Always fill low spots with a primer or leveling compound before applying the base coat. Q: How long should the concrete cure after repair? A: Wait at least 28 days for new concrete repairs or at least 24 hours for patching compounds.

What must be done to uncoated concrete before applying anything?
Before applying any coating to uncoated concrete, you must first execute complete surface preparation. Start by etching the slab with a muriatic acid or citrus-based solution to remove laitance and open pores. Immediately after, perform a chip test to identify old paint or sealers; if present, grind them off completely. Next, repair all cracks with a flexible epoxy filler and fill low spots with a patch compound. Finally, vacuum and then damp-mop to achieve a dust-free, absorbent surface that coatings can mechanically lock into.
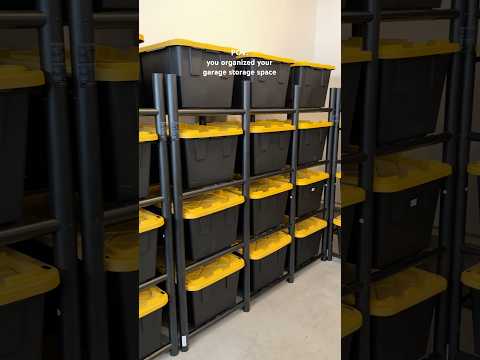
Uncoated concrete demands thorough etching, full removal of any residues, crack repair, and a final Orga Spaces garage organization clean to create a porous, contaminant-free foundation for adhesion.
How important is moisture testing and crack repair?
Moisture testing and crack repair are absolutely critical for a lasting garage floor. Skipping a moisture test is a gamble; trapped vapor can bubble and delaminate your new coating within months. Likewise, filling cracks with a quality patching compound isn’t cosmetic—it prevents the crack from telegraphing through your finish or spreading. For a durable result, thorough surface preparation is non-negotiable. Use a plastic sheet test or a concrete moisture meter to verify dryness, then take time to grind and fill every fissure.
Moisture testing and crack repair form the foundation of a garage floor that won’t peel or crack under pressure.
Practical Tips for Maintaining Your Protected Surface
After installation, wait a full seven days before parking vehicles to allow the coating to fully cure. Clean spills immediately using a pH-neutral cleaner and a soft-bristle broom, as harsh chemicals can degrade the protective layer. Avoid dragging metal jack stands or dropping heavy tools directly on the surface; instead, place a rubber mat or plywood underneath. For routine maintenance, dry-mop weekly and perform a gentle wash every month. Q: How often should I reapply a topcoat? A: Typically every two to three years, depending on traffic and exposure to road salts. This periodic resealing reinforces the protective barrier against stains and tire marks.
What cleaning methods keep the shine without damaging the top layer?
To preserve the gloss without abrading the protective top layer, use a pH-neutral cleaner specifically formulated for coated floors. Avoid harsh degreasers, bleach, or acidic wheel cleaners, which can etch the finish. For routine cleaning, spray the neutral cleaner and agitate with a soft-bristle broom or microfiber mop, then rinse with clean water and dry with a squeegee. Stubborn oil stains should be lifted with a paste of the neutral cleaner and diatomaceous earth, letting it sit for 15 minutes before gentle agitation. Never use abrasive pads or steam cleaners, as these dull the shine by micro-scratching the clear coat.
Q: What cleaning methods keep the shine without damaging the top layer?
A: Stick to pH-neutral cleaners and soft tools like microfiber mops or soft-bristle brooms; avoid abrasives and acidic chemicals. Always rinse thoroughly to prevent residue haze.
How often should you reseal or recoat a high-use floor?
For a high-use garage floor, plan to reseal or recoat every 1 to 2 years. Daily traffic, tire friction, and chemical spills degrade the sealer’s bond faster than in low-use spaces. A simple water-bead test—where water pools instead of soaking in—tells you it is still protected. High-use floor recoating schedules should accelerate if you notice dull spots or thin patches. Heavy vehicles or frequent parking shifts can halve that interval to annually. Q: How often should you reseal or recoat a high-use floor? A: Typically every 12 to 24 months, depending on wear.
Common DIY Pitfalls and When to Call a Pro
Many DIYers underestimate surface preparation, leading to common DIY pitfalls like peeling epoxy within months. Skipping concrete etching or ignoring moisture issues guarantees failure. Another frequent mistake is applying coatings during high humidity or extreme temperatures, which causes bubbling and poor curing. For cracked or heavily stained concrete, professional grinding and patching are essential. When to call a pro is clear: if your floor has significant cracks, a high moisture vapor emission rate, or if you lack industrial-grade equipment for proper grinding. Complex designs or polyaspartic coatings also demand expert application. Trusting a professional saves you the headache of a failed, costly redo and ensures a durable, flawless finish.
Why do some home applications bubble or peel within months?
Home garage floor coatings that bubble or peel within months usually fail because of inadequate surface preparation. Concrete is porous; if you skip etching or grinding, moisture trapped beneath the coating vaporizes in heat, lifting the film. Applying epoxy over old sealers or curing compounds also prevents mechanical bonding, causing immediate delamination. Temperature swings in uninsulated garages accelerate expansion and contraction, cracking a rigid coating that wasn’t flexible. Rushing recoat windows—adding a top layer before the base cures fully—traps solvents, forming blisters that rupture under tire pressure.
What signs indicate a pro-grade system is worth the cost?
Persistent moisture beading or white efflorescence on a DIY paint job signals a moisture vapor issue that only a pro-grade polyaspartic or epoxy system with a proper primer can seal. Visible cracking, pitting, or flaking within months of application indicates the surface was not sufficiently profiled, a step commercial grinders accomplish far deeper than consumer rentals. If hot-tire pickup lifts your coating after a single summer, a professional system’s higher solids content and thermal tolerance become necessary. Repeated coating failure after at least two DIY attempts is the clearest sign that investing in a pro-grade, warranty-backed install is worth the cost.